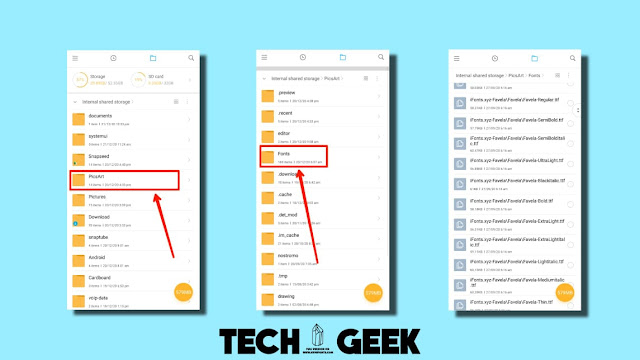
Picart is very famous for photo editing. It has lots of features that convert any simple photo into a beautiful photo. Personally, I used it to make a Youtube thumbnail.
And many Youtubers used PicsArt to edit photos and to Make professional thumbnail.
It gives you all features for photo editing like text editing, color correction, cropping, beautiful effects, collage maker, many stickers, free stock images, and many tools that if you use then you can create outstanding images.
It is very popular because it has 1 billion downloads in the Apple play store as well as Google Play store. And if you search Piscart tutorial on Youtube then you can get lots of tutorials on Youtube.
Because many people use Piscart and make stunning images that are so impressive.
You can create beautiful quotes, youtube thumbnail, posters for online presence, and many more.
And when we do text editing then we get only default fonts are that are not so good. And you also may know that Font is very important in your photo or thumbnail.
It makes the simple photo into a clickbait or eye-catching photo. If You are a graphic designer then you know that Font plays a large role in the beautification of posters, thumbnails, and Photos.
So, you have to add more fonts to PicsArt. This is a simple solution. 😂😂
So, I take this post to solve this problem. If you read the whole post without any skipping then you can easily add fonts to Picsart.
Add Custom Fonts to PicsArt
If you want to add Custom fonts to PicsArt then you have to follow these steps. And these steps are so simple.


0 Comments